


Thanks to everyone who commented via blog, emails, twitter, and facebook about my Nautical Inspired Boys Room! As requested, here is my tutorial for making the book sling. I also received requests for a tutorial on stripes. Look for it this week as well.
What I loved most about making the book sling is that I see my beginner’s sewing project put to use and secondly, it allowed me to customize the size and coordinate the fabric to suit my space.


Step 1:
I made this book sling using a fitted sheet. If you aren’t, proceed to Step 2.Remove elastic from fitted sheet by making small cuts on the perimeter and pulling it through the openings.

Step 2:
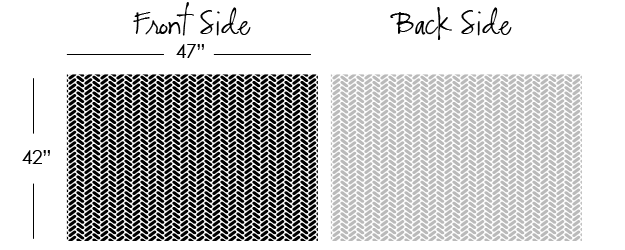
Lay fabric flat. Measure and cut fabric to 47″ x 42.”
Step 3:
Fold the fabric lengthwise with the “FRONT SIDE” facing. You now have double thickness now measuring 47″ x 21.”

Step 4:
Using a 1/2″ seam allowance, sew the fabric along the two long sides and one of the short sides. Sew only half of the second short side to about half way.

Step 5:
*Don’t lose me here* Turn the fabric FRONT side out by pulling it through the opening you left on the 4th side. A pencil really helps with this. Once complete, fold the raw edges inside and stitch close.
Step 6:
You’ve done a great job…we’re almost done! Now let’s make the pocket for the dowels. (a.) One the long sides, fold fabric over by 2 inches, pin it, and (b.) sew down the length of the fabric. Repeat on the other side.

Step 7:
Install it! Use your stud finder to locate studs about 47″ apart. Mark lightly with a pencil. I used my level to make a straight line between the two marks. After all my hard work, I would’ve been crushed if my book sling wasn’t level!
Drill holes where you will insert your screws. I found a stud on the left side of my sling, but used the plastic anchors (that came with the brackets) to secure the right side.
Step 8:
Attach curtain brackets to the wall. Insert dowels into the sling pockets, then insert the ends of the dowel into the curtain brackets. There are little screws on the brackets which will allow you to tighten the dowel firm into the hardware. You are done!

I, unfortunately, was not clever enough to have thought of this idea first. It actually came from this post from at Penny Carnival. Here are a couple more photos of book slings in kids’ rooms.


+ show Comments
- Hide Comments
add a comment